Blog
How to Identify and Replace Common Car Spare Parts Yourself

Owning a car comes with its fair share of responsibilities, including the occasional need for replacing spare parts. While many car owners prefer leaving this task to professionals, there are several common car spare parts that you can identify and replace yourself. Not only does this help you save money, but it also gives you a sense of empowerment and satisfaction. In this article, we will guide you through the process of identifying and replacing common car spare parts, enabling you to take control of your vehicle’s maintenance. So, roll up your sleeves, grab your toolbox, and let’s get started!
The Importance of Identifying and Replacing Car Spare Parts
When it comes to car maintenance, identifying and replacing spare parts play a crucial role in ensuring your vehicle’s optimal performance and safety. Ignoring worn-out or faulty components can lead to more significant issues down the road, potentially compromising your driving experience and even endangering your life. By learning to recognize and replace common car spare parts, you can maintain your vehicle’s reliability and prolong its lifespan.
Basic Tools You’ll Need
Before delving into the specifics of identifying and replacing car spare parts, it’s important to have a basic understanding of the tools you’ll need for the job. Some essential tools include a socket wrench set, screwdrivers (both flathead and Phillips), pliers, a jack, and jack stands. These tools will provide you with a solid foundation for most DIY car maintenance tasks.
Identifying Common Car Spare Parts
Now that you have a basic toolkit and are armed with your owner’s manual, let’s dive into the process of identifying common car spare parts. From the battery and spark plugs to the air filter and brake pads, understanding these components will empower you to take action when needed. Let’s explore a few of these parts in more detail:
Battery
The battery is a crucial component that provides electrical power for starting the engine and operating various systems in your car. Learning to identify a worn-out battery can save you from being stranded. Look for signs such as slow cranking, dim headlights, or a bloated battery case. To replace the battery, follow these steps:
- Ensure the engine is turned off and the car is parked in a safe location.
- Locate the battery, typically found under the hood or in the trunk.
- Disconnect the negative (-) terminal first by loosening the nut and removing the cable.
- Repeat the process for the positive (+) terminal.
- Remove any battery clamps or brackets securing the battery in place.
- Lift out the old battery carefully and dispose of it properly.
- Place the new battery in the same position, ensuring the positive and negative terminals align correctly.
- Reattach the clamps or brackets, starting with the positive terminal followed by the negative terminal.
- Tighten the terminals securely and ensure they are free of any corrosion.
- Test the new battery by starting the engine.
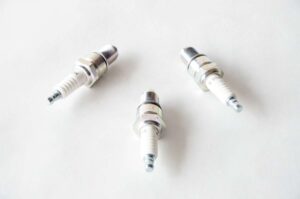
Spark Plugs
Spark plugs play a crucial role in igniting the air-fuel mixture in the engine’s cylinders. To identify faulty spark plugs, check for signs such as rough idling, difficulty starting the engine, or decreased acceleration. To replace spark plugs, follow these steps:
- Allow the engine to cool down before starting the replacement process.
- Locate the spark plugs, which are typically attached to the engine’s cylinder head.
- Remove the spark plug wires or ignition coils connected to each spark plug, taking care not to damage them.
- Use a spark plug socket and ratchet to loosen and remove the old spark plug.
- Inspect the condition of the old spark plug, checking for signs of wear or damage.
- Adjust the gap of the new spark plug using a gap tool or consult the owner’s manual for the correct gap specification.
- Insert the new spark plug into the socket and carefully thread it into the cylinder head by hand to avoid cross-threading.
- Use the spark plug socket and ratchet to tighten the new spark plug, ensuring a snug fit without overtightening.
- Reattach the spark plug wires or ignition coils to their respective plugs, following the correct order.
- Repeat the process for each spark plug in your engine.
Air Filter
The air filter prevents dust, debris, and contaminants from entering the engine, ensuring clean airflow. To identify a dirty air filter, inspect it visually for excessive dirt or damage. To replace the air filter, follow these steps:

- Locate the air filter housing, which is usually situated near the engine’s intake system.
- Open the housing by removing any clips, latches, or screws.
- Take note of the orientation of the old air filter before removing it to ensure proper installation of the new one.
- Carefully remove the old air filter, being cautious not to allow any debris to fall into the intake system.
- Inspect the old air filter for excessive dirt or damage, which indicates the need for replacement.
- Insert the new air filter into the housing, aligning it correctly with the airflow direction indicated on the filter.
- Close the housing and secure it using the appropriate clips, latches, or screws.
- Ensure the housing is tightly sealed to prevent any unfiltered air from entering the engine.
- Start the engine and check for proper airflow and any unusual noises.
Brake Pads
Brake pads are crucial for safe stopping, and worn-out pads can compromise your vehicle’s braking performance. To identify worn brake pads, listen for squeaking or grinding noises while braking and visually inspect the thickness of the pad. To replace brake pads, follow these steps:

- Park the vehicle on a flat surface and engage the parking brake.
- Locate the brake calliper, which is typically positioned near the rotor.
- Use a socket wrench or appropriate tool to loosen the calliper bolts and remove them.
- Carefully slide the calliper off the rotor, taking care not to strain the brake line.
- Inspect the old brake pads for wear, thickness, and any signs of damage.
- Remove the old brake pads from the calliper bracket.
- Before installing the new brake pads, use a brake piston compression tool to push the piston back into the calliper.
- Place the new brake pads into the calliper bracket, ensuring they align correctly with the rotor.
- Slide the calliper back onto the rotor, aligning it with the bracket and the bolt holes.
- Reinsert and tighten the calliper bolts, ensuring they are securely fastened but not overtightened.
AC Filter
The AC filter, also known as the cabin air filter, helps maintain clean air inside the vehicle’s cabin. To replace the AC filter, follow these steps:

- Refer to the owner’s manual to locate the AC filter housing, which is typically situated behind the glove compartment or under the hood.
- Open the housing by removing any clips, latches, or screws.
- Take note of the orientation of the old AC filter before removing it to ensure proper installation of the new one.
- Carefully remove the old AC filter, paying attention to any debris or dirt that may have accumulated.
- Inspect the old AC filter for excessive dirt or clogging, indicating the need for replacement.
- Insert the new AC filter into the housing, aligning it correctly with the arrows or airflow direction indicated on the filter.
- Close the housing and secure it using the appropriate clips, latches, or screws.
- Ensure the housing is tightly sealed to prevent any unfiltered air from entering the cabin.
- Test the AC system to ensure proper airflow and functionality.
Finding Replacement Parts
Once you have identified the faulty spare part, the next step is to find a suitable replacement. There are various options available, including original equipment manufacturer (OEM) parts, aftermarket parts, and used parts. Fortunately for you all these are available at Partex. So go buy your replacement parts now from Partex.
Conclusion
Congratulations! You have now learned the basics of identifying and replacing common car spare parts. By taking the initiative to handle these repairs yourself, you save money and gain a deeper understanding of your vehicle. Remember to always prioritize safety, consult your owner’s manual, and use the appropriate tools for the job. With practice and confidence, you’ll be able to tackle more complex repairs, empowering you to keep your car running smoothly for years to come. So, the next time you face a faulty spare part, roll up your sleeves, put on your DIY hat, and get ready to take control of your car’s maintenance. Happy repairing!
 Suzuki
 Honda
Honda Toyota